Use rock salt at roughly one part salt to six parts ice by volume, layered in alternating bands as you pack the bucket — about three cups of rock salt to a standard bag of ice for a 4 to 6 quart machine. Only ice-and-salt bucket machines need salt at all. Freezer-bowl machines, compressor machines, spin machines and stand mixer attachments need none, and putting salt anywhere near them does nothing but corrode metal.
The ratio is forgiving in one direction and not the other, which is the part worth understanding before you pack a bucket.
Why salt is there at all
Plain ice sits at 32 F, and 32 F is not cold enough to freeze an ice cream base in a reasonable time. Ice cream needs the surface of the canister to be well below freezing so that heat flows out of the mixture fast.
Salt solves that by depressing the freezing point of the brine around the ice. As salt dissolves it forces the ice to melt, melting absorbs a great deal of heat, and the resulting salt water can sit far below 32 F without freezing solid — cold enough to pull heat out of the canister quickly. It is the same physics that keeps roads clear in winter, run backwards for dessert.
The working numbers
Ratio: about 1 part rock salt to 6 parts ice by volume. A common kitchen rule of thumb is 1 cup of rock salt per 6 to 8 cups of crushed ice. For a full bucket: roughly 3 cups of rock salt to a standard bag of ice on a 4 to 6 quart machine, packed in alternating layers. Salt type: coarse rock salt, sometimes sold as ice cream salt. Ice type: crushed or cubed, not a solid block. Treat these as the starting point rather than a specification: no manufacturer publishes a precise ratio, because it depends on ice size, ambient temperature and how long you churn.
What too much salt actually does
This is the mistake people do not expect, because more salt sounds like more cold. It is more cold, and that is the problem.
A very heavily salted brine gets extremely cold very quickly, which freezes the layer of mixture touching the canister wall into a hard crust before the paddle has had time to work the whole batch. The result is a grainy, chunky ice cream with a frozen collar and a soupy middle, plus a motor laboring against a solid wall. It is the same failure as over-chilling in any machine: fast is good, instantaneous is not, because the dasher needs the mixture to stay workable while it incorporates air.
Too little salt fails the obvious way: the brine never gets cold enough, the churn runs long, the ice melts and you end up with soft, icy ice cream. If you have to err, err slightly low and churn a few minutes longer. The texture consequences of a slow freeze are the subject of why homemade ice cream is icy.
How to pack the bucket
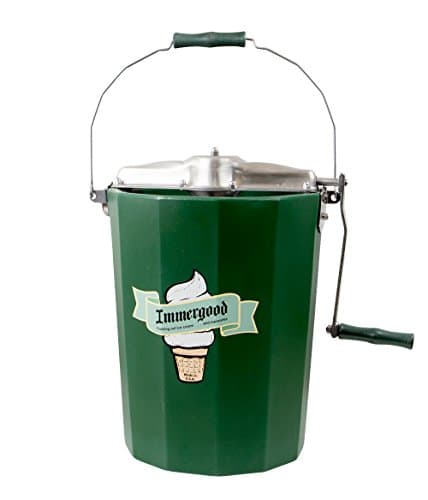
- Put the filled, sealed canister in the bucket and fit the dasher and motor mount before you add any ice. Packing first makes seating the canister a fight.
- Add about three inches of crushed ice around the canister, then a generous handful of rock salt scattered over it. Repeat in layers to the top.
- Stop level with the top of the mixture inside the canister, not level with the lid. Ice above that line chills air, not ice cream, and brine near the seal is how salt water gets into your dessert.
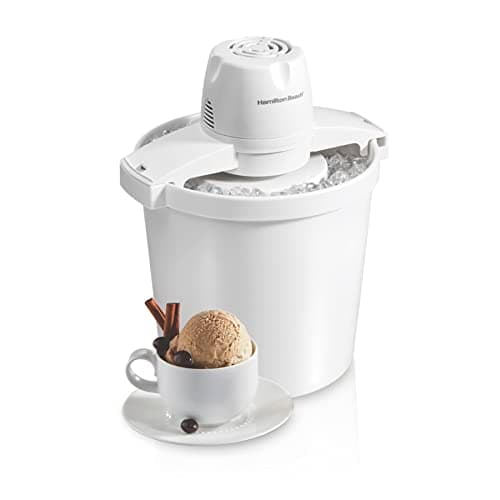
- Start the motor, or start cranking. The handle or motor note will change audibly as the mixture stiffens — the Hamilton Beach 68330N stops itself at that point, which is a genuinely useful feature.
- Top up with ice and salt during the churn if the level drops. A 20 to 40 minute churn melts a lot of ice.
One sequencing note that saves a batch: when the churn finishes, lift the canister out and rinse its outside in fresh water before you open it. Brine running down the rim into finished ice cream is the single most common way a bucket batch gets ruined, and it is irreversible.
The step people skip
Ice cream out of a bucket machine is soft-serve consistency. It wants a hardening period — a few hours in the freezer in a shallow covered container — before it scoops properly. The aluminum canister on the Nostalgia ICMP600WD can go straight into the freezer, which is the easiest version of this.
Alternatively you can repack the bucket with fresh ice and salt, wrap the whole machine in a towel and leave it to harden in place for an hour, which is the traditional method and works well on a hot day when freezer space is short. Either way, what happens next is covered in storing homemade ice cream.
Which salt, and what not to use
Rock salt or ice cream salt. Coarse crystals dissolve at a sensible rate, which gives a steady, even cold rather than a spike. This is the right choice and it is cheap.
Table salt works but is harder to control. Fine grains dissolve almost instantly, which gives you the over-salted failure described above unless you measure carefully. If it is all you have, use less than the rock-salt quantity and add in stages.
Do not use road salt or de-icing salt. It is not food grade and often contains anti-caking agents and other additives. The brine is not meant to touch the ice cream, but on a machine where brine and a canister seal share a bucket, that is not a margin worth gambling.
Do not use salt in any other kind of machine. A freezer-bowl machine stores its cold in a sealed gel wall; a compressor machine makes its own. Salt in or around either does nothing useful and corrodes metal fittings. If you are not sure which type you own, ice cream maker types explained sorts it out in five lines.
The running cost nobody prices in
Salt and ice are the only per-batch consumable in this category, and they are the honest reason a bucket machine is not simply the cheapest option. A bag of ice and a box of rock salt per batch is a real cost, and the salt water has to be drained somewhere that will not mind it — not onto a lawn, not into a planted bed.
It still works out well for its actual use case. The Hamilton Beach 68330N makes 4 quarts in one batch for less than most 1.5-quart machines cost, which is the cheapest capacity on this site, and the Nostalgia ICMP600WD makes 6. For a party a few times a year that arithmetic is very hard to beat, and it falls apart entirely for a weeknight pint — the comparison across every type is in the best ice cream maker for the money and the big-batch roundup.
Two other notes. Bucket machines are messy enough that they belong near a garden tap or a sink — the cleaning routine is in how to clean an ice cream maker. And packing the ice is the one job on this page a child can do with no supervision and no blade anywhere near them, which is why bucket machines lead the roundup for kids.